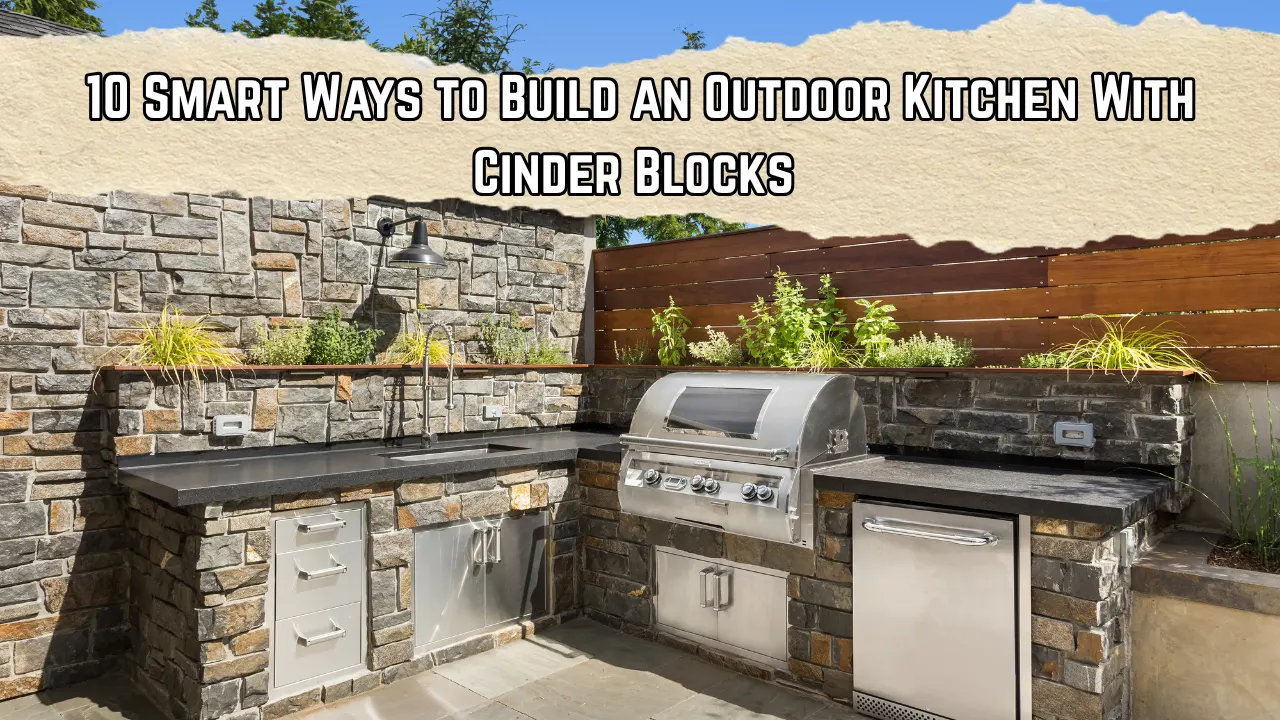
Creating an outdoor kitchen doesn’t have to involve expensive construction or complex renovations. With the right materials and a simple plan, you can build a practical outdoor cooking area using cinder blocks. These blocks are affordable, durable, and easy to assemble, making them perfect for DIY backyard projects.
A cinder block outdoor kitchen can work in small patios, large backyards, or even garden corners. The key is focusing on smart planning, sturdy construction, and thoughtful finishing touches. Below are ten practical steps that help you design and build a functional outdoor kitchen using cinder blocks.
1. Start With a Simple Layout Plan
Before placing the first block, it’s important to plan how your outdoor kitchen will be used. Many DIY projects become complicated because people try to include too many features from the beginning.
A straight-line layout or compact L-shape works well for most beginners. Sketch your idea and measure the available space carefully. This planning stage helps estimate how many blocks, countertops, and materials you will need.
A clear layout also ensures your outdoor kitchen remains comfortable to move around in while cooking.
2. Choose the Right Outdoor Location
The success of an outdoor kitchen depends heavily on where it is placed. Look for a location with level ground, proper drainage, and enough ventilation.
It’s also helpful to keep the kitchen relatively close to the house. This makes it easier to carry ingredients, dishes, and cooking tools back and forth.
Avoid placing the cooking area too close to wooden walls or areas exposed to strong wind. A well-chosen location makes the kitchen safer and more enjoyable to use throughout the year.
3. Create a Strong and Level Foundation
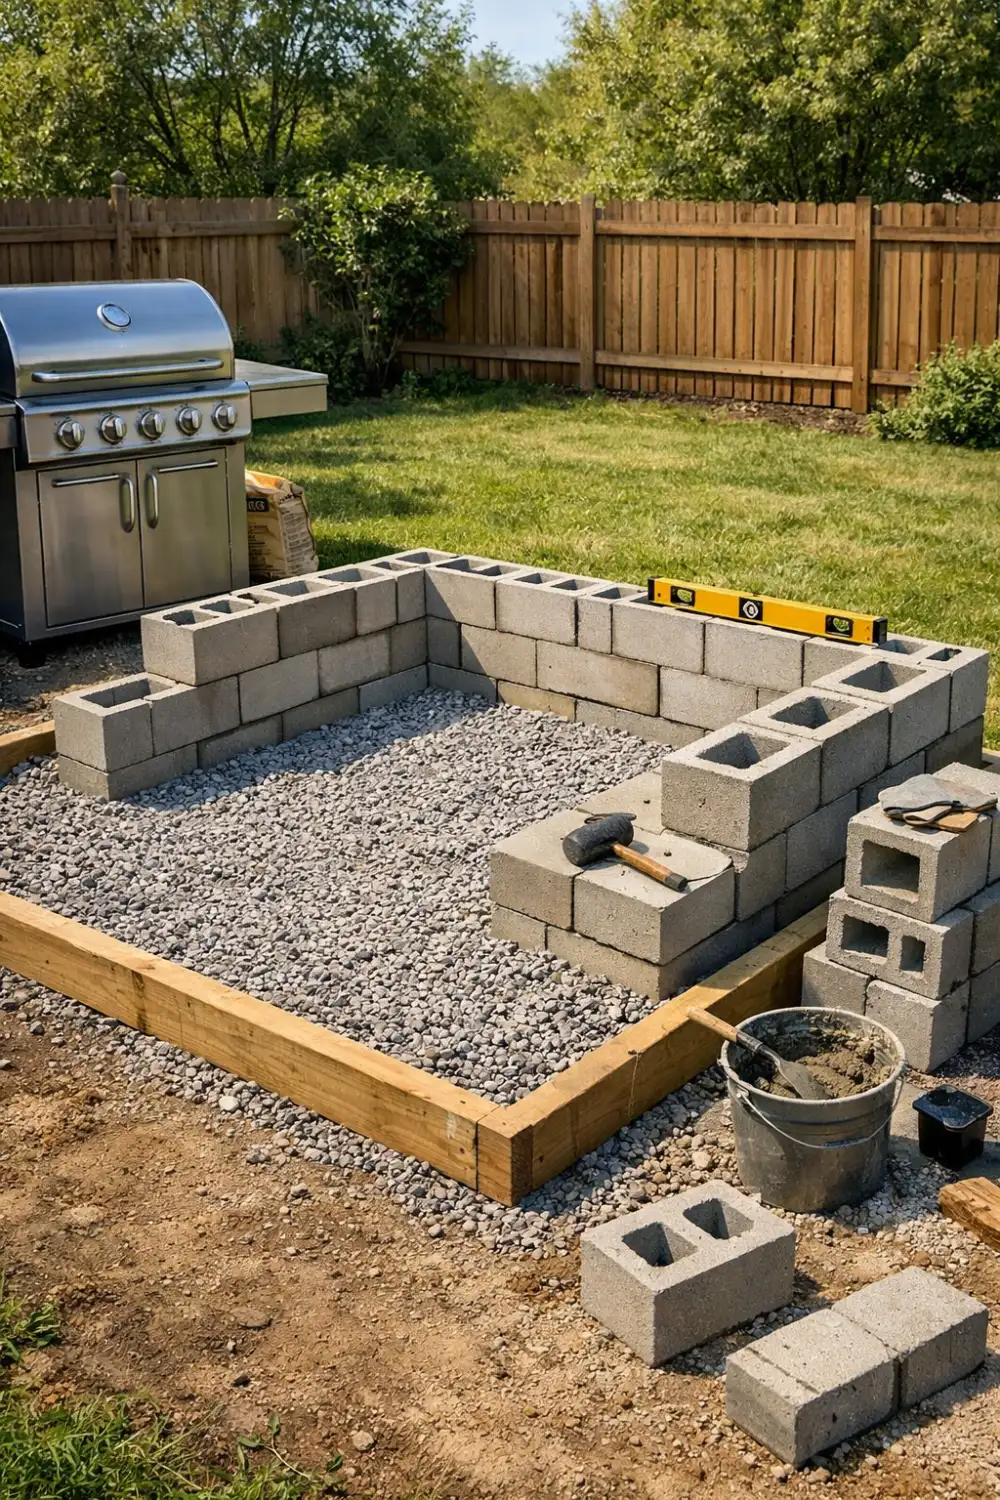
Every durable outdoor kitchen begins with a solid base. Clear the ground completely and compact the soil before starting construction.
Adding a gravel layer or pouring a small concrete slab creates a stable foundation for the cinder blocks. This prevents shifting, cracking, or uneven surfaces later.
Although this step takes time, it ensures the structure can support heavy grills, countertops, and cooking equipment without problems.
4. Stack Cinder Blocks Carefully for Stability
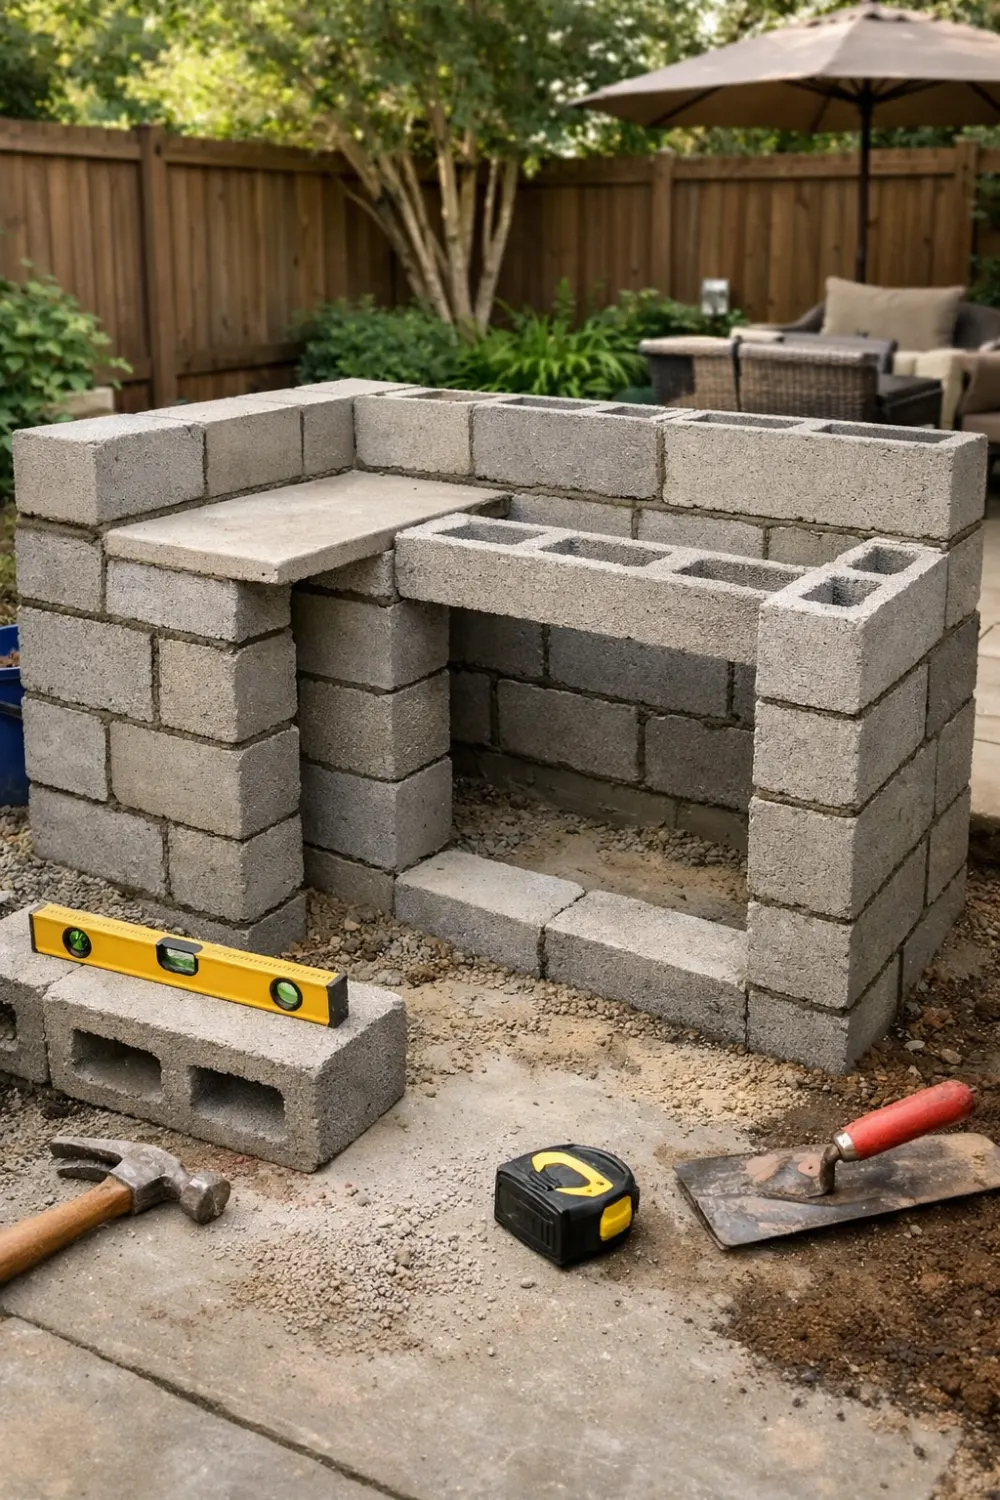
Cinder blocks are relatively easy to assemble, but proper alignment is essential for strength. Place each block carefully and check the level regularly while building.
Some DIY builders prefer dry stacking blocks first, which allows small adjustments during construction. After the layout feels correct, construction adhesive or mortar can be added to secure the blocks.
This method keeps the structure strong while still allowing flexibility during the building process.
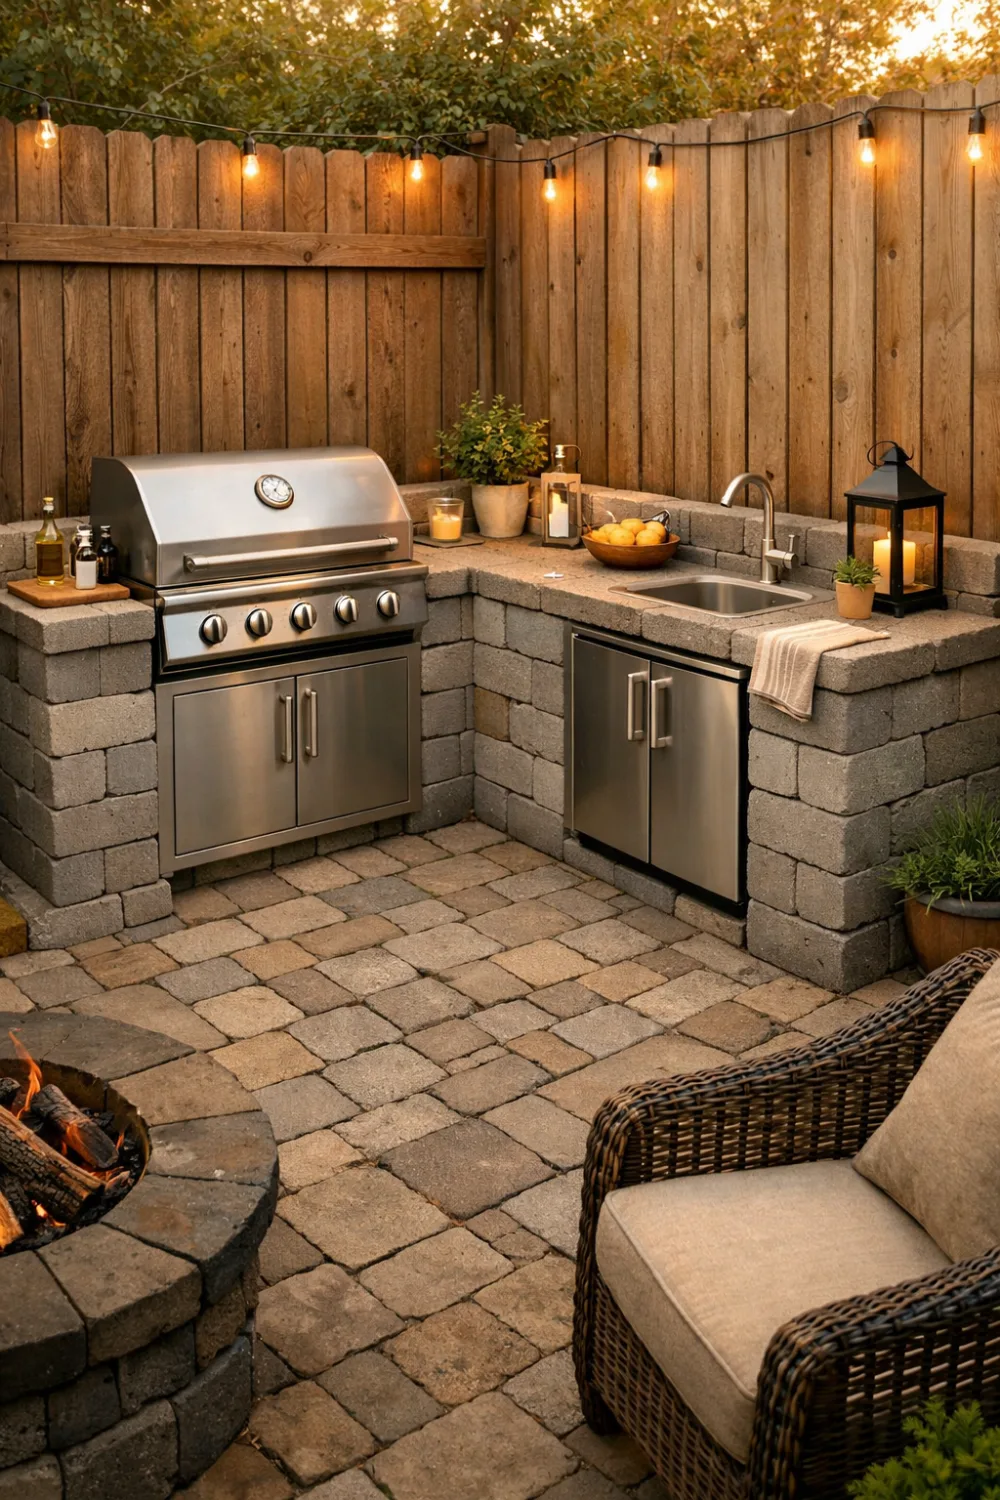
5. Use Block Openings for Built-In Storage
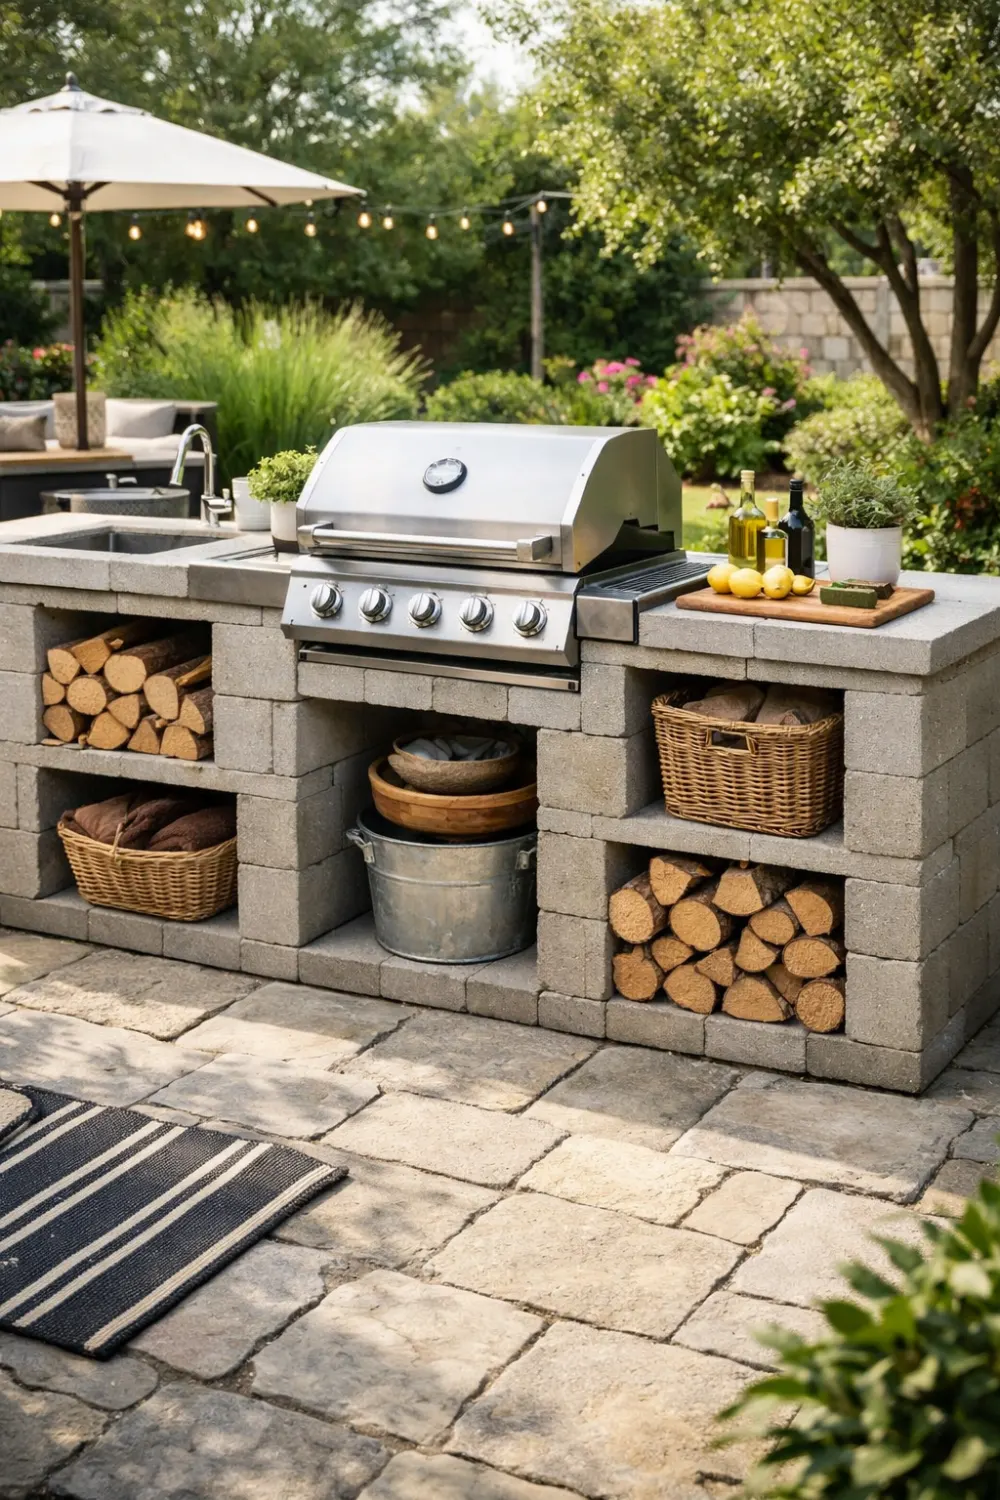
One advantage of cinder blocks is their hollow interior. These openings can become practical storage spaces for firewood, cooking tools, or outdoor supplies.
Instead of installing expensive cabinets, you can slide baskets or containers into the openings. This keeps everything organized while maintaining a clean and simple design.
Built-in storage also helps reduce the overall cost of the project.
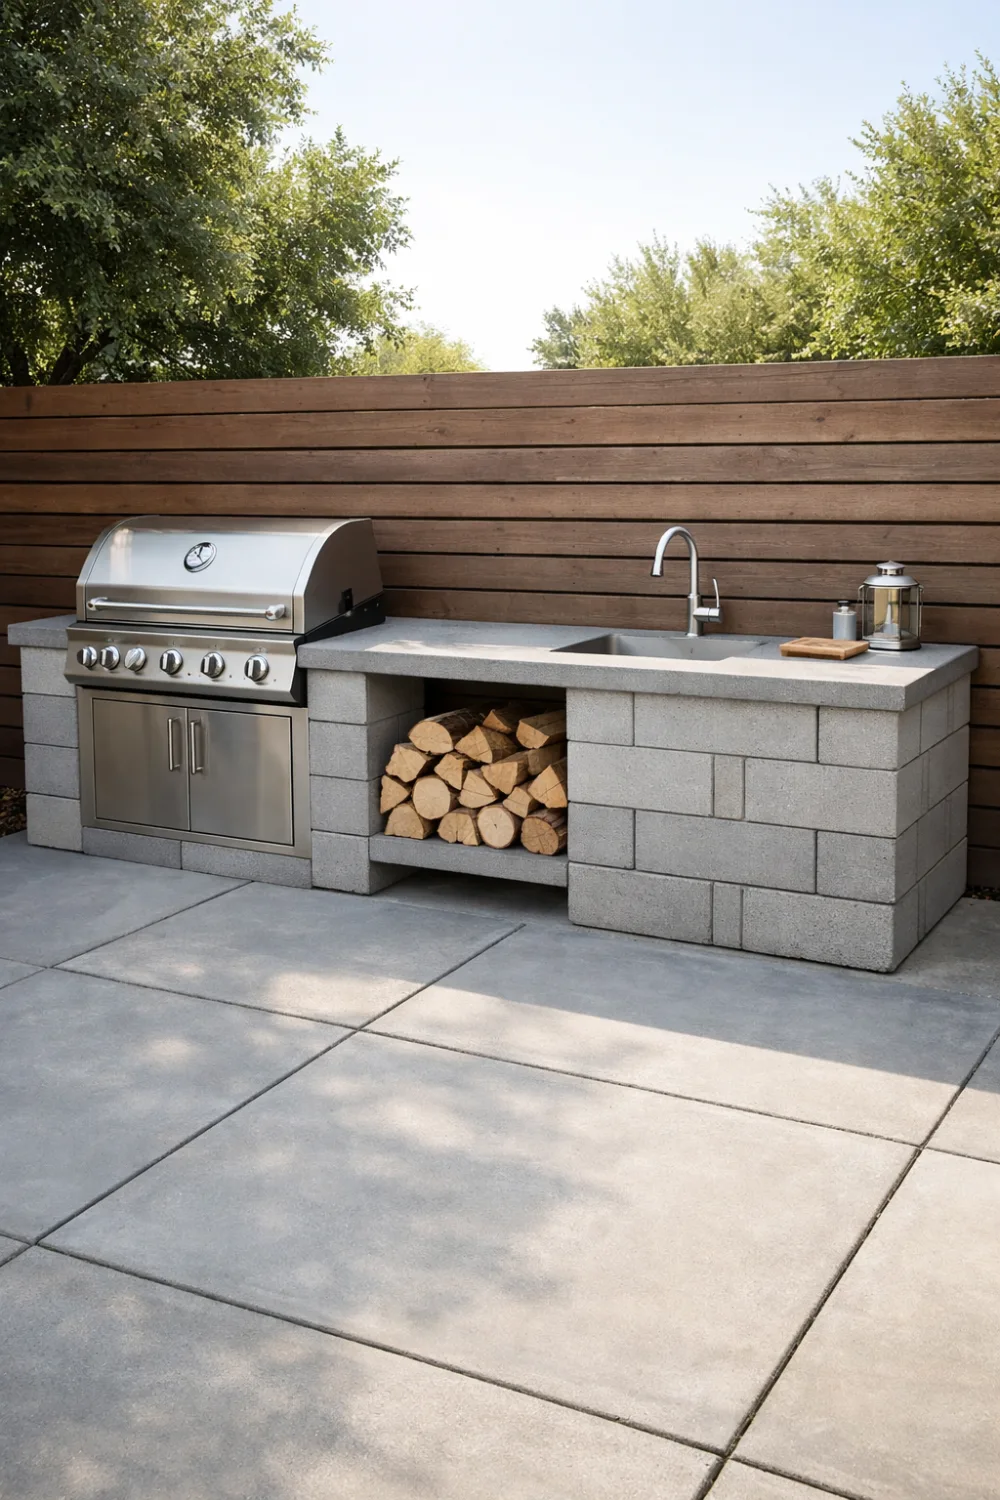
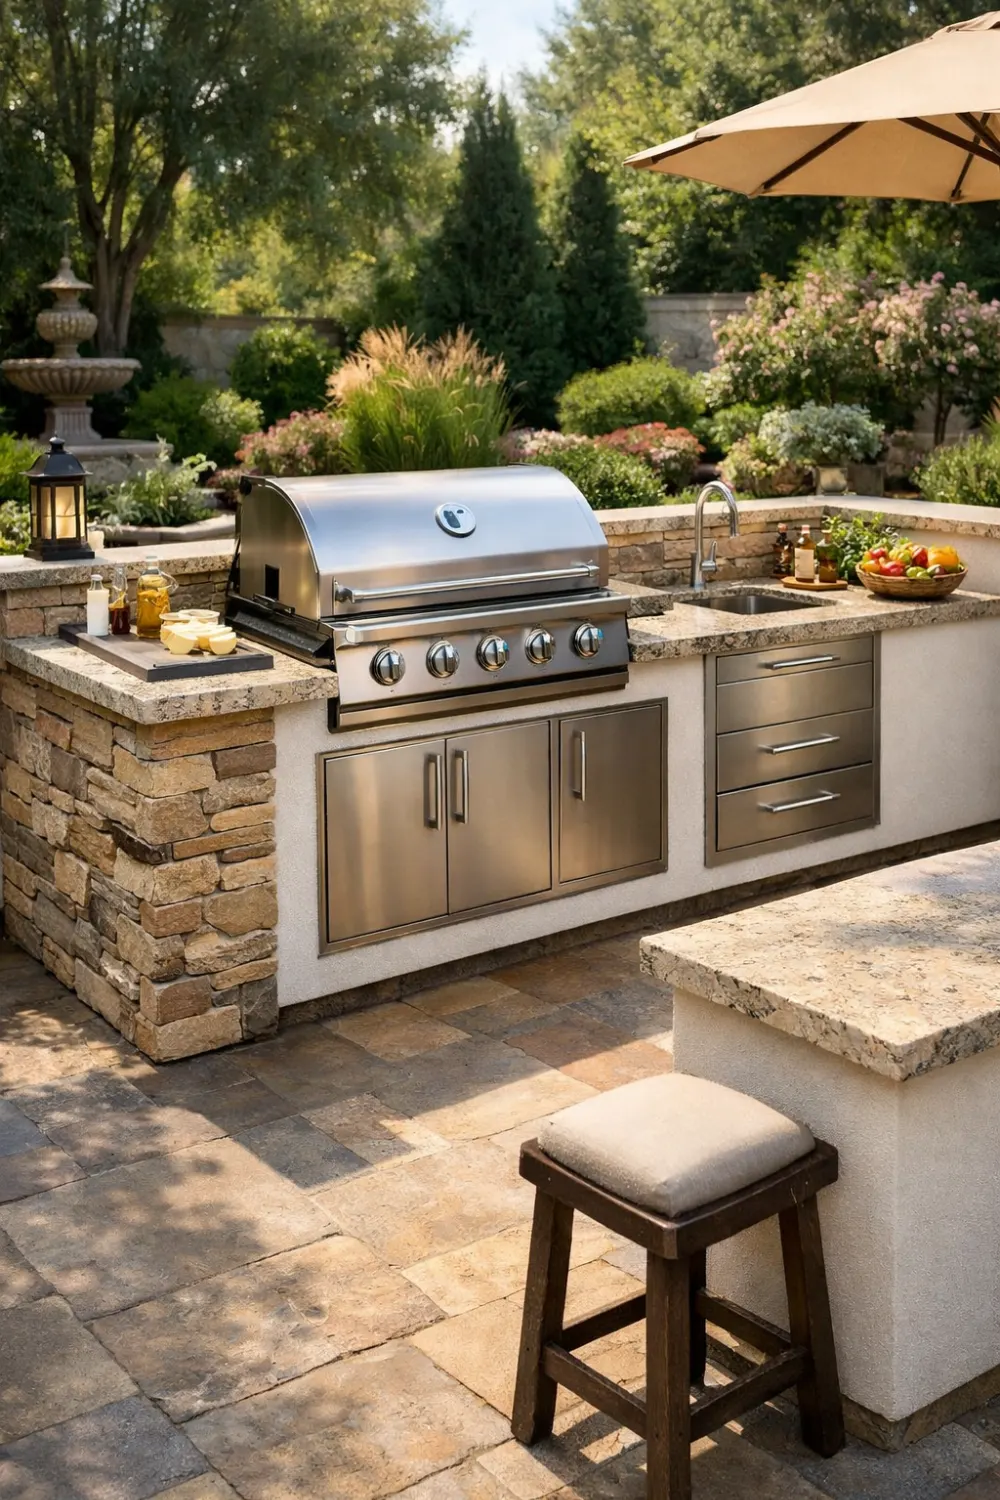
6. Install a Durable Countertop
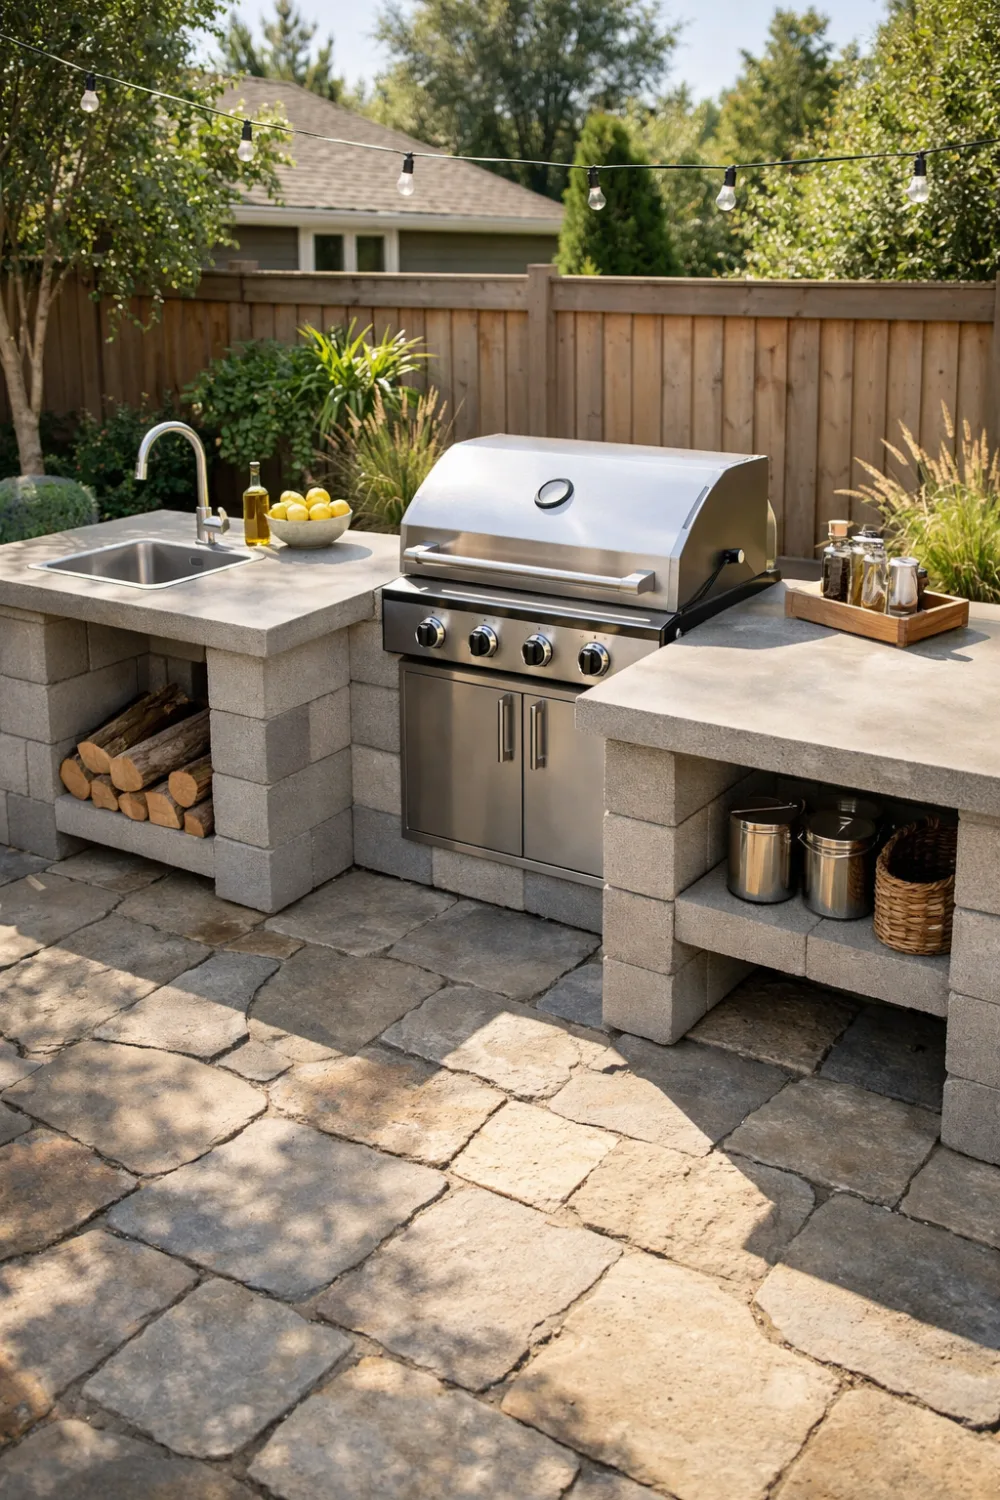
Once the cinder block structure is complete, the countertop transforms it into a true outdoor kitchen. Concrete countertops are a popular choice because they are affordable and weather-resistant.
Stone slabs or tile surfaces can also work well depending on your budget and design preferences. Whatever material you choose, make sure it can withstand heat, moisture, and outdoor conditions.
A strong countertop provides enough space for food preparation, serving, and cooking.
7. Build Around Your Grill or Cooking Station
The grill is usually the centerpiece of an outdoor kitchen. Before building the block structure, decide what type of cooking equipment you will use.
Leave enough space for airflow and safe movement around the grill. Instead of enclosing it tightly, design the structure to act as a support frame.
This flexible approach allows you to upgrade your grill later without rebuilding the entire kitchen.
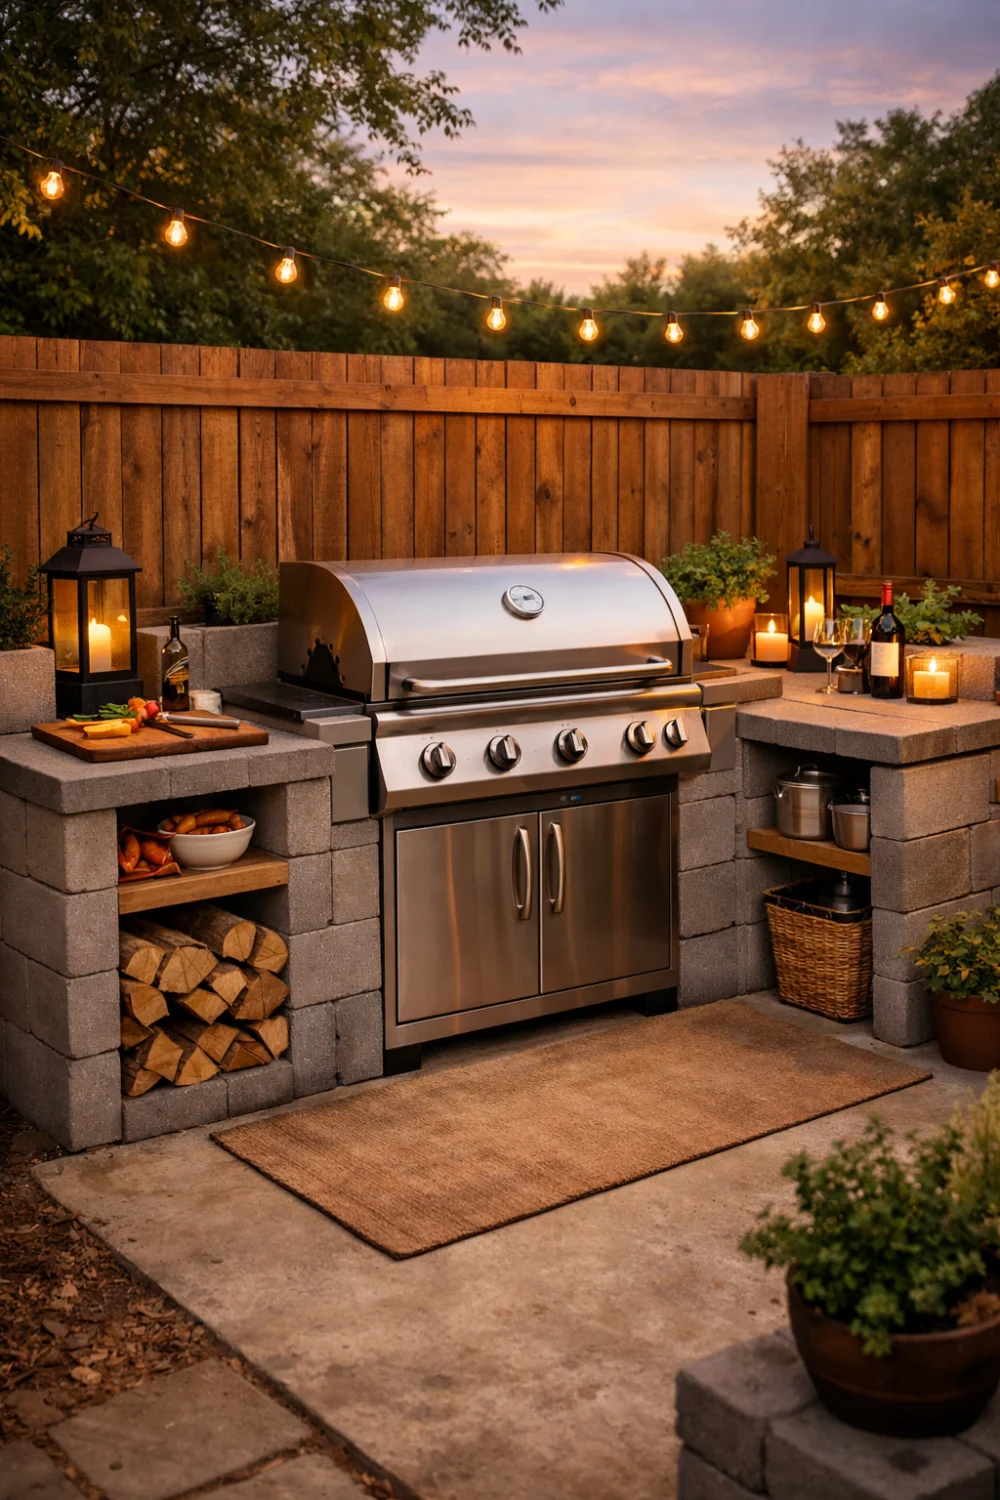
8. Improve the Look With Simple Finishes
Raw cinder blocks are strong but can look unfinished. Applying outdoor paint, stucco, or a thin cement coat gives the kitchen a more polished appearance.
Stone veneer is another popular option if you want a more decorative style. Finishing materials also protect the blocks from moisture and temperature changes.
A simple finish can dramatically improve the visual appeal of your backyard cooking area.
9. Add Seating for a Social Cooking Space
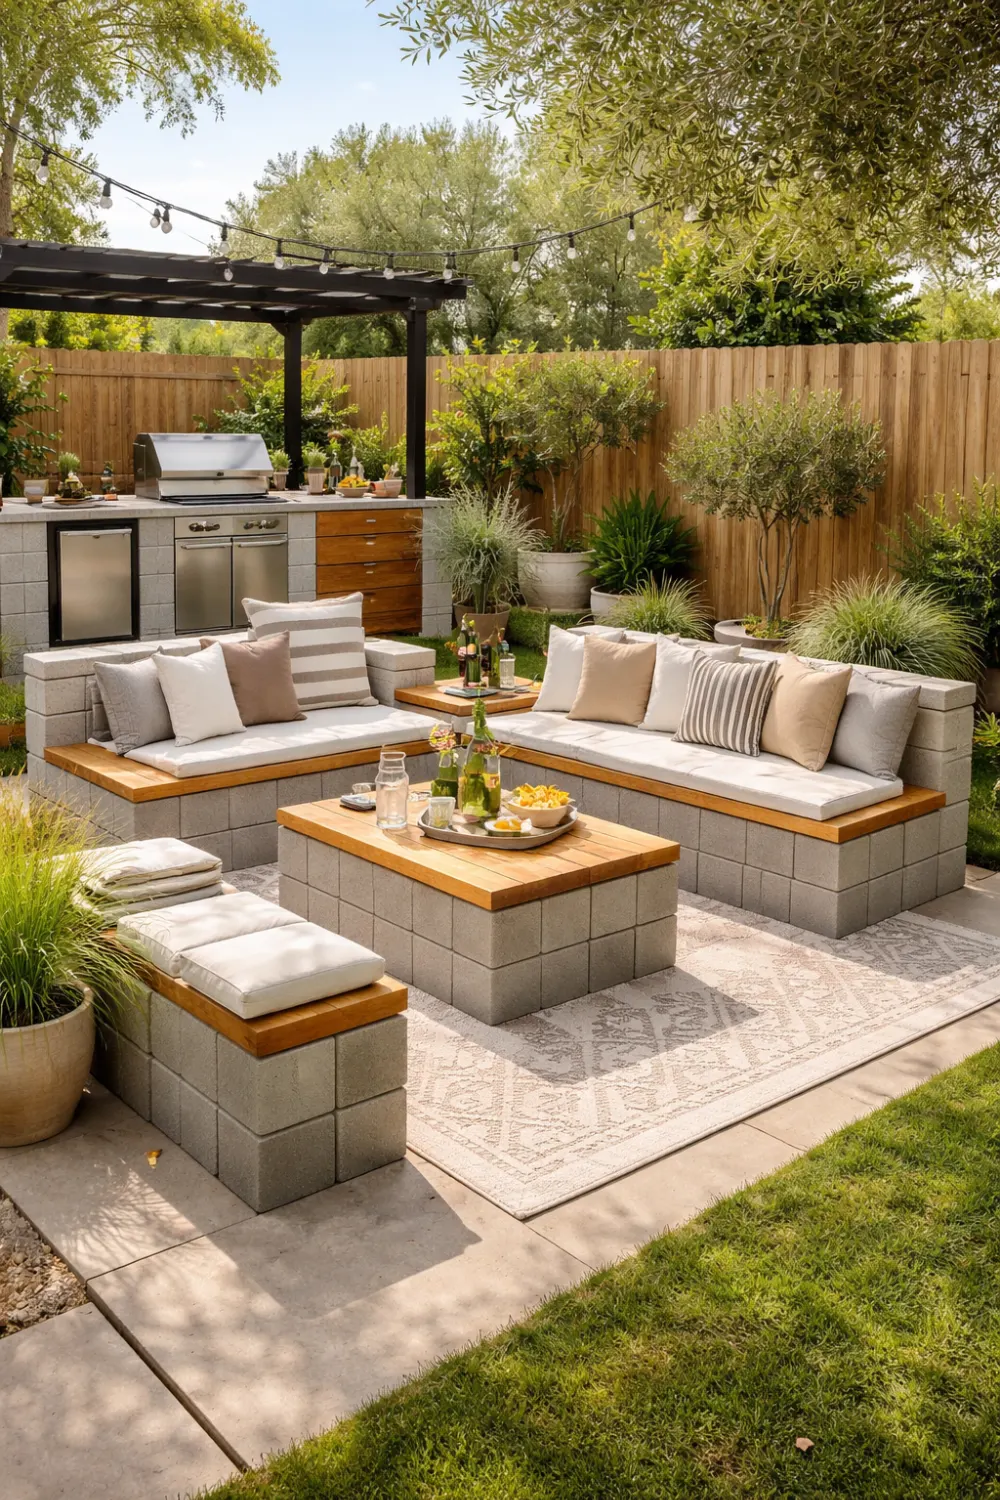
Outdoor kitchens are often used for gatherings with friends and family. Adding a small seating area makes the space more inviting.
You can build benches using extra cinder blocks and wooden planks, which keeps the design consistent with the kitchen structure. Cushions or outdoor fabric can make the seating comfortable.
This budget-friendly idea turns the outdoor kitchen into a relaxed social zone rather than just a cooking station.
10. Plan for Maintenance and Long-Term Use

After construction is complete, proper maintenance helps the kitchen last for many years. Sealing concrete surfaces protects them from grease stains and weather damage.
Cleaning the area regularly and covering it during harsh weather conditions will extend its lifespan. Small inspections from time to time can also prevent structural issues.
With a little care, a cinder block outdoor kitchen can remain functional and attractive for a long time.
Final Thoughts
Building an outdoor kitchen with cinder blocks is one of the most practical DIY projects for homeowners who enjoy cooking outdoors. The materials are affordable, the construction process is manageable, and the design possibilities are flexible.
With thoughtful planning, a strong foundation, and simple finishing touches, you can create a backyard kitchen that feels both functional and welcoming. Whether you want a basic grill station or a full outdoor cooking area, cinder blocks offer a reliable and budget-friendly solution.


Leave a Reply